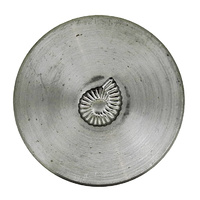
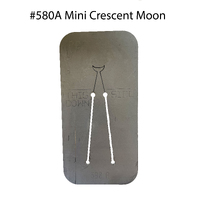
Pancake Die 649 Large Dog Bone with Hole Tab
Notify me when back in stock
Pancake Die 649 Large Dog Bone with Hole Tab
40mm (1 ¾") Length.
Potter USA Pancake Die Information: The pancake dies are designed to cut non-ferrous metal (copper, silver, brass, gold, nickel) 20 gauge and thicker to about 16 gauge. They work best when the metal is hard. If the metal is too soft, you will get a burr and it will be difficult to remove your part from the die. Do not anneal metal first. The dies only work in one direction - with words face down. Dies are pre-sprung so that you know where to put the metal. If you use metal that is too thick or too thin, it is possible to damage the die. As long as you stay within the recommended gauges, the dies should last many years under normal use.
Potter USA Pancake Dies
About pancake dies:
· Designed for use in a 20-ton hydraulic press (some designs may work with 12-ton or 8-ton presses [we do not sell these], but require much more upper body strength and effort)
· Available in Mild Steel and/or Stainless Steel (To see which you have, use a magnet! Stainless steel is NOT magnetic.)
· Use ONLY with full-hard non-ferrous metal (copper, silver, brass, gold, nickel)
· Acceptable metal gauges: 16-20 gauge (mild steel) or 16-22 gauge (stainless steel)
· Dies are laser cut: Cutting edges are straight, not at an angle
· Shipped pre-sprung so that you know where to insert the metal
· Lifespan: When used correctly, will cut hundreds of blanks and last many years under normal use (varies from die to die depending on gauge and type of metal being cut).
STOP! Read all instructions before using pancake dies. This will familiarise you with the parts, the tools required and the correct order to follow for proper use of pancake dies.
General Safety: DOs and DO NOTs
DO …
… use full-hard non-ferrous metal
… use 16-20 gauge (mild steel) or 16-22 gauge (stainless steel)
… ALWAYS center your work on the lower platen.
… ALWAYS use spacers to avoid overextending the ram.
… keep your work area clean.
… keep children away from the press at all times.
… keep fingers away from moving parts.
… tie back long hair.
… wear safety eye and face protection when using the press.
… only use replacement parts from Gemcuts (Australia) & Potter USA.
DO NOT …
… use metal thinner than 20-gauge (22-gauge for stainless steel dies) or thicker than 16-gauge
… use ferrous metal (including steel-based tins, such as mint tins)
… use annealed metal
… operate the press when you’re tired or under the influence of alcohol or drugs.
… wear loose clothing or jewelry.
… operate the press beyond its rated capacity.
… place cast iron, springs, fragile or brittle objects, or any item that could disengage from the press.
… put heat-treated tool steel dies or bench blocks in the press unless you know they have been properly heat tempered. They can shatter like glass.
Mild Steel Pancake Dies
Use ONLY 20-gauge to 16-gauge full-hard non-ferrous metal
Stainless Steel Pancake Dies
Use ONLY 22-gauge to 16-gauge full-hard non-ferrous metal
How-to
1. Prepare die - Hold die text side up and push design image with thumbs to create small gap. When die is sitting correct way up (text down), design image will be raised enough to slide metal between.
2. Insert your metal into the pre-sprung die. Do NOT insert it up to or past the two holes in the tab(s)! The die will not cut from the holes down, and you will likely damage the die and will not be able to remove your metal from the die.
3. Add spacers to the lower platen of the press to reduce the distance the ram needs to be extended.
4. Center the pancake die on the lower platen (or a spacer) of a hydraulic press. Dies will work in one direction only; the etched words must be FACE DOWN.
5. Begin to pump the jack and raise the lower platen. You’ll know the die has cut the metal when you hear a loud pop (smaller designs may have much less of an audible pop; larger designs can be quite loud).
6. Lower the platen, and remove the die.
7. Carefully remove the excess metal from the exterior of the die.
8. Sometimes the cut blank falls out of the die (most common with simple shapes). If it does not fall out easily, try using your fingers to press the die together to release the blank. If that doesn’t work, place the far edge of the die (metal side down) on the edge of a wooden work surface, and tap the back of the die with a RAWHIDE or PLASTIC mallet. Make sure to strike the die straight down and not at an angle, as doing so may damage the die.
9. If needed, use your fingers or our pancake die opener (available separately) to open the die more to accept the metal again.
10. Repeat to cut as many blanks as desired.
Burrs: Are they normal?
Yes, burrs on the back of a blank cut with a pancake die are to be expected. Complex designs with lots of detail tend to leave the most burrs; it’s the nature of how the dies are made. To minimize burrs, use thicker and/or harder metal. Luckily, it’s easy to remove burrs. Use flush cutters to trim off large burrs, a file, sandpaper, or small belt sander.
Bracelet Pancake Dies
In order to use bracelet pancake dies and cut the blank, the entire cutting surface must be covered with a spacer. After you insert metal into the die, place a 6” x 8” aluminum spacer (available separately) on top of the die, completely covering it. This distributes the pressure across the length of the die, allowing it to easily cut through the metal.
Troubleshooting
My metal is stuck. What happened?
There are a number of possible scenarios that will cause metal to become trapped in the die.
· Metal is too soft.
· Metal is too thin.
· Metal was inserted to or past the two holes in the tab(s).
· Design is complex with lots of points/tight curves. These areas tend to cause the most trouble; use thicker/harder metal next time to avoid the metal being pulled into the die at these points.
What kind of metal should I use?
Our pancake dies only work with full-hard non-ferrous metal. If you don’t purchase full-hard metal, you MUST start with thicker metal (16 gauge+) and use a rolling mill or hammer to thin it and sufficiently work-harden it (to 18-20 gauge).
Can I roll-print dead-soft metal to harden it before using a pancake die?
Yes, but there are a few things to keep in mind. Running metal through a rolling mill with a pattern plate will harden the metal, but it will also thin it substantially. It may not seem like much, but if you start with 20-gauge metal, by the time it’s roll-printed, it will have decreased a number of gauges, making it too thin to use with our pancake dies. Often, 20-gauge metal will end up as 24- or 26-gauge in as little as one pass. Ideally, texture your metal after cutting out a blank with a pancake die.
If you do want to use softer metal and texture it before cutting it, you MUST start with thicker metal (16 gauge+) and use a rolling mill or hammer to thin it and sufficiently work-harden it (to 18-20 gauge).
(PPD649)
| SKU | PPD649 |
| Brand | Potter USA |
| Shipping Weight | 0.1600kg |
| Shipping Width | 0.080m |
| Shipping Height | 0.010m |
| Shipping Length | 0.150m |
| Shipping Cubic | 0.000120000m3 |
Be The First To Review This Product!
Help other Gemcuts users shop smarter by writing reviews for products you have purchased.